
How to Repair Gutter Leaks Before They Cause Bigger Damage
Learning how to repair gutter leaks early can prevent serious damage to your home. A small leak may look harmless at first, but it can lead to wall stains, damp patches, rotten wood, and costly repairs if you leave it alone.
The best way to repair gutter leaks is to find the exact leak, clean the area fully, and use the right sealant or replacement part. If the gutter joint, corner, or section is badly damaged, replacement is often the better choice.
This guide is based on widely used residential gutter repair methods and practical maintenance experience with common gutter systems.
How do you repair gutter leaks?
Clean the gutter, locate the leak, dry the area, and apply gutter sealant to cracks or joints. Replace damaged seals, joints, or sections if the leak is severe or keeps returning.
Quick fix guide
| Problem | Best fix |
|---|---|
| Small crack | Apply gutter sealant |
| Leaking joint | Clean and replace the seal |
| Corner leak | Reseal or replace the corner |
| Sagging gutter | Adjust or replace brackets |
| Repeated leak | Replace the damaged section |
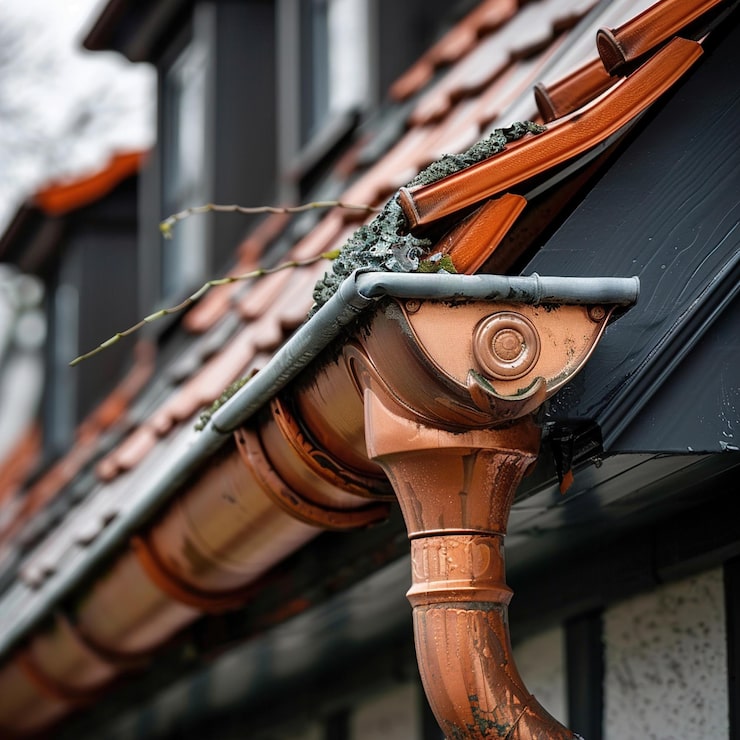
Why gutter leaks happen
Gutters are supposed to carry rainwater away from your home. When they leak, the water escapes in the wrong place and starts damaging surfaces that should stay dry.
Most leaks happen for a few simple reasons:
Dirt and leaves block the gutter.
The rubber seal inside a joint wears out.
A corner section cracks.
The gutter pulls away from the wall.
A section is fitted badly.
Water sits in one place instead of flowing out.
Practical tip: Always check the rubber seal inside joints, as this is one of the most common failure points.
Signs of a gutter leak
You do not need special training to notice a leaking gutter. The signs are often easy to see after rain.
Look for these:
Water dripping from a joint or corner.
Water spilling over the side.
Wet patches under the gutter.
Stains on outside walls.
Peeling paint near the roof edge.
Puddles near the base of the house.
Damp marks, mold, or green streaks.
If you see these signs, the gutter is not moving water properly and needs attention.
What to check first
Before you repair anything, try to find the real cause of the leak. Many people seal the wrong place and then the problem comes back.
Check these points first:
Is the gutter full of leaves or dirt?
Is the leak coming from a joint?
Is the leak coming from a corner?
Is one section loose or hanging down?
Does water only overflow during heavy rain?
Is the seal cracked, hard, or missing?
A careful check saves time and helps you choose the right repair.
What you need for a basic repair
For most small gutter leak repair jobs, you do not need many tools. Keep these ready:
Ladder.
Gloves.
Bucket.
Warm water.
Soap.
Sponge or cloth.
Gutter sealant.
Waterproof tape.
Screwdriver.
Replacement joint or corner piece, if needed.
The key is not having fancy tools. The key is cleaning the area well and fixing the actual problem.
Best sealant for gutter leaks
Use a waterproof, exterior-grade gutter sealant such as silicone or polyurethane-based products. These are made to handle rain, sun, and temperature changes without cracking too fast.
Do not use weak indoor caulk or general glue for a long-term repair. Outdoor gutters need a product that can stay flexible and hold up in wet weather.
How to repair gutter leaks
Small cracks and holes can often be repaired without replacing the whole gutter. The process is simple, but each step matters.
Step 1: Clean the gutter
Remove all dirt, leaves, and loose material from the damaged area. Wash it with warm soapy water, then dry it fully.
Important: Sealant will fail quickly if applied to a damp surface.
Step 2: Find the exact leak
Do not guess. Run water through the gutter or wait for rain, then watch closely. Find the exact place where the water escapes.
Step 3: Apply gutter sealant
Use a sealant made for outdoor gutter repairs. Apply it directly over the crack or hole and spread it evenly so the damaged area is fully covered.
Step 4: Use waterproof tape for small temporary fixes
Waterproof tape can help with small leaks or emergency repairs. Press it firmly onto a dry surface and make sure there are no bubbles or gaps.
Step 5: Test the repair
Let the sealant dry fully. Then run water through the gutter again and check whether the leak has stopped.
If water still escapes, the damage is probably larger than it first looked.
How to repair a gutter joint leak
A gutter joint leak is one of the most common gutter problems. Joints are weak points because they join two sections together, and that connection can wear out over time.
Step 1: Remove the joint carefully
Unclip the joint gently. Do not force it, or you may crack the gutter section.
Step 2: Clean the joint and seal
Wash the joint with warm soapy water and remove every bit of dirt, grit, and old sealant. Even small debris can stop the joint from sealing properly.
Step 3: Check the rubber seal
Look closely at the seal inside the joint. If it is cracked, hard, stretched, or missing, replace it.
Step 4: Refit the joint correctly
Put the joint back in place slowly and make sure it sits straight on both sides. If it is uneven, water will leak out again.
Step 5: Add sealant if needed
If the joint still looks weak, apply a thin line of gutter sealant before closing it again. Do not use too much.
Step 6: Test with water
Run water through the gutter and watch the joint carefully. If it still leaks, the joint itself may need replacing.
Reality check: If a gutter keeps leaking after two repairs, replacement is usually more cost-effective.
How to repair leaking gutter corners
Corners need special care because they handle more pressure than straight sections. They often leak when the seal is old or the corner piece has started to crack.
To repair leaking gutter corners, follow these steps:
Clean the corner completely.
Remove old sealant and dirt.
Check for cracks or warping.
Apply fresh gutter sealant inside the corner.
Let it dry fully.
Test it again with water.
If the corner is split or badly worn, a replacement corner piece is the better long-term fix.
When replacement is better than repair
Not every leak should be patched. Some gutters are too damaged to fix properly.
You should think about replacement if:
The gutter has many cracks.
The joint leaks again after sealing.
The corner piece is broken.
The gutter is sagging.
Water keeps pooling in one section.
The material is old and brittle.
A small repair can help for minor damage, but repeated leaks usually mean the part is too weak to keep using.
When to call a professional
If your gutters are high, difficult to access, or leaking in multiple areas, it is safer and more effective to get professional help.
You should also call a professional if:
The gutter is very loose.
Water is damaging the wall or roof area.
You are not sure where the leak starts.
The repair keeps failing.
The problem may be with the slope or installation.
A proper repair matters more than a quick patch, especially when the damage is bigger than it first looks.
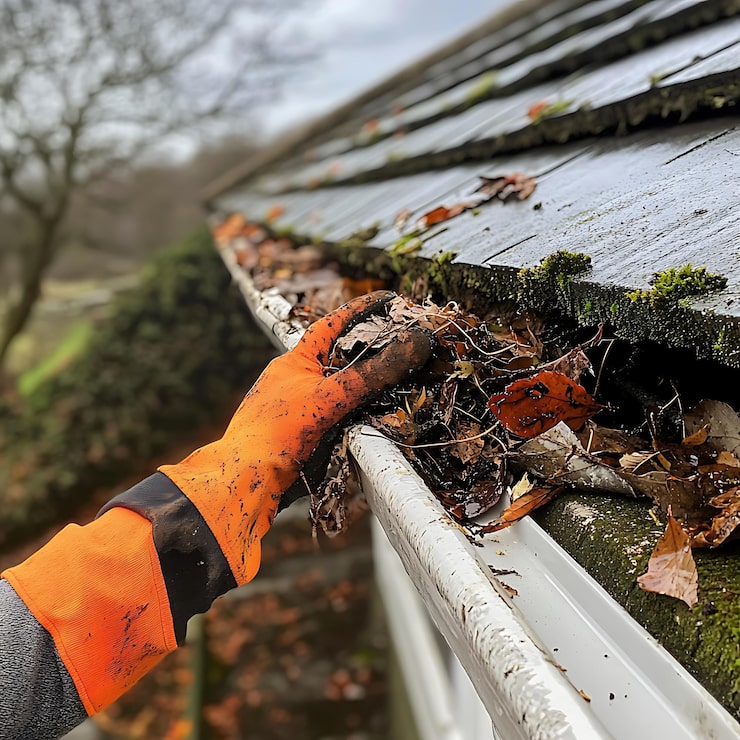
Why cleaning matters so much
Many gutter leaks get worse because the gutter is blocked. When leaves and dirt build up, water cannot flow out properly. It stays in the gutter, puts pressure on the joints, and can force water through small gaps.
This is why cleaning is part of the repair, not just extra work. A clean gutter is less likely to leak, overflow, or sag.
Common mistakes to avoid
A lot of gutter repairs fail because the job was rushed. Avoid these mistakes:
Sealing over dirt.
Applying sealant to a wet area.
Ignoring a damaged seal.
Forgetting to test the repair.
Fixing only one spot and missing the rest of the gutter.
Using the wrong product for outdoor use.
A strong repair starts with a clean surface and a careful inspection.
How to prevent future leaks
Once you fix the leak, take a few simple steps to stop it from coming back.
Clean gutters at least twice a year.
Remove leaves after storms.
Check joints and corners after heavy rain.
Fix loose brackets early.
Replace worn seals before they fail.
Make sure the gutter slopes toward the downpipe.
Taking care of minor maintenance today can help you avoid major repairs down the line.
Frequently Asked Questions
The best way is to clean the damaged area, use the right gutter sealant, and replace any badly damaged parts if needed.
Yes, if the damage is small. Clean the joint, check the seal, refit it properly, and test it with water.
Clean the corner, remove old sealant, apply fresh sealant, and test it again. Replace the corner if it is cracked or weak.
Repair small leaks and cracks. Replace sections that are badly cracked, sagging, or leaking again after repair.
The most common reasons are a bad seal, poor cleaning before repair, hidden damage, or a gutter section that is too weak to hold a seal.
Final thoughts
Gutter leak repair is not just about stopping water for today. It is about protecting your home from damage that can grow quietly over time. If you act early, clean the area well, and choose repair or replacement based on the real damage, you can solve most gutter problems before they get worse.
Learning how to repair gutter leaks, how to repair a gutter joint leak, and how to repair leaking gutter corners gives you a simple way to protect your home and avoid larger repairs later.